#encaustic
Newer paintings...from October
Thursday/January 21/2016 Filed in: painting
Here are some images of the latest paintings I made, although they are from October. I’m currently on an extended sabbatical from painting, as I work on some new projects. These paintings incorporate hummingbirds, which are sacred birds in many Native American cultures. Often the birds symbolize prayer, the spirits of those that are deceased, or specifically God’s presence. I’ve also expanded to using gold leaf in two of these.
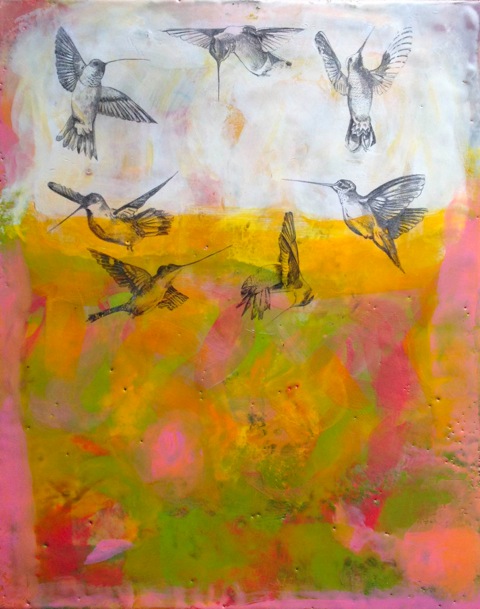
“The Prayers of the People”
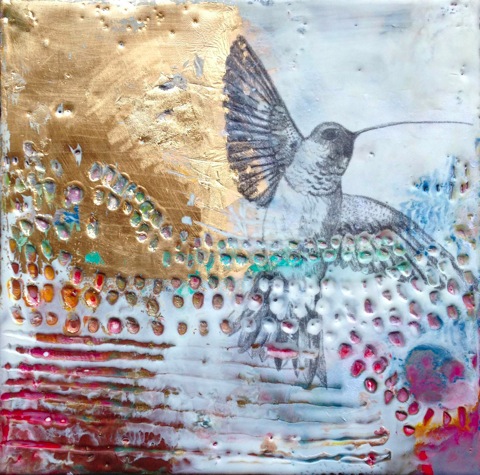
“Hummingbird”
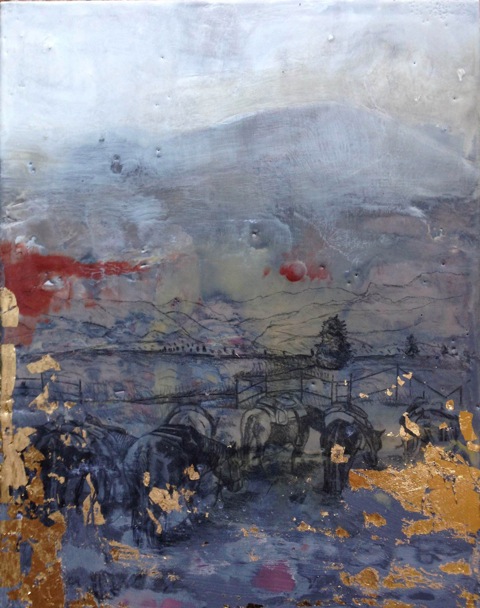
“Rocky Mountain National Park”
**This painting is currently missing! Sad story: I mailed it for a show in Houston in November and it never arrived. Right after I mailed it, I was in a bad car accident and lost the tracking ticket that had been in my car. This painting is still missing.
“The Prayers of the People”
“Hummingbird”
“Rocky Mountain National Park”
**This painting is currently missing! Sad story: I mailed it for a show in Houston in November and it never arrived. Right after I mailed it, I was in a bad car accident and lost the tracking ticket that had been in my car. This painting is still missing.
Comments
A new series "States"
Sunday/October 11/2015 Filed in: painting | Encaustic Painting
UPDATE to this post: Just finished the new painting for Colorado. This is from a photo taken in Breckenridge this summer.

__________________________________________________________________________
Recently I have been pondering what elements tie all of my paintings together, besides the obvious subject, nature. The answer is LOCATION.
It’s no secret that I have traveled a lot and I have lived in four different states within the USA. The places that I have lived were very different from each other, but they have all held places that came to have great meaning.
With that thought in mind, I have started a new series on “states.” I don’t know if I will be able to complete all 50, as there are still a few states I have yet to visit and I DO NOT paint anything that doesn’t originally stem from my own photograph or experience. I have completed four thus far:
1. IOWA
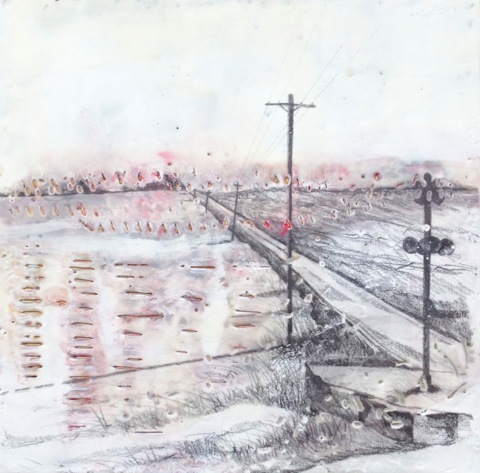
I’ve done so many paintings now on my home state. This is from an image I took through the window of Amtrak this past December. I’m not sure exactly where it is, or where the roads lead, but it feels cold and lonely.
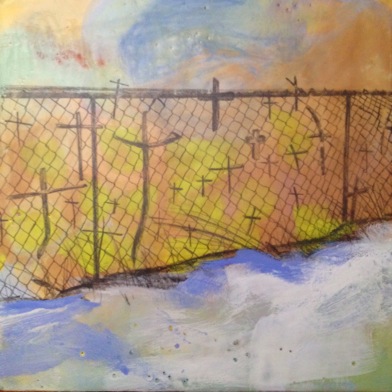
2. ARIZONA
Over a year ago, my family and I went on a day trip to Arizona and visited the Navajo reservation. We were fortunate enough to see the Veteran’s Cemetery in Fort Defiance. The colors in the land, the way the plots were decorated, and the fact that my father is also a veteran, made this a very moving place for us.
3. NEBRASKA

I think Nebraska gets a bad wrap. When I hear people talk about it, it is usually within context of “I had to drive through Nebraska to get to...” Yes, I was driving through on a brisk fall day this past fall, but I think the colors in the encaustic wax captured the beauty in that particular day.
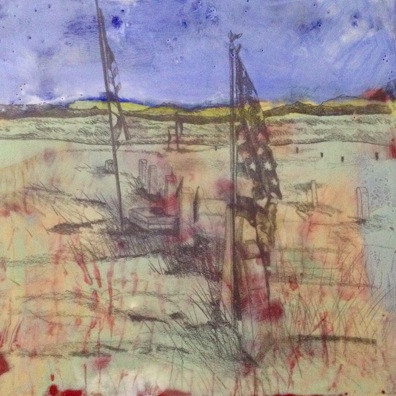
4. NEW MEXICO
I lived in New Mexico for six years and during that time I took a memorable day trip to Chimayo. Chimayo is just north of Santa Fe, a small village located on soil that is considered Holy. During the year people from around the world visit the churches here, and it is a sacred place during Holy Week. This is a wall along an area where people line up during Holy Week, and continue onward toward the churches. It is a beautiful and unique place.
- - - - - - - - - - - - - - - - - - - - - - - - - - - - - - - - - - - - - - - - - - - - - - - - - - - - - - - - - - - - - - - - - - - - - - - -
More will be coming SOON! I would love to know your thoughts on this particular series. Do you have you have any ideas of special locations in your state? What is unique or has a special story? I would love to hear your thoughts!
__________________________________________________________________________
Recently I have been pondering what elements tie all of my paintings together, besides the obvious subject, nature. The answer is LOCATION.
It’s no secret that I have traveled a lot and I have lived in four different states within the USA. The places that I have lived were very different from each other, but they have all held places that came to have great meaning.
With that thought in mind, I have started a new series on “states.” I don’t know if I will be able to complete all 50, as there are still a few states I have yet to visit and I DO NOT paint anything that doesn’t originally stem from my own photograph or experience. I have completed four thus far:
1. IOWA
I’ve done so many paintings now on my home state. This is from an image I took through the window of Amtrak this past December. I’m not sure exactly where it is, or where the roads lead, but it feels cold and lonely.
2. ARIZONA
Over a year ago, my family and I went on a day trip to Arizona and visited the Navajo reservation. We were fortunate enough to see the Veteran’s Cemetery in Fort Defiance. The colors in the land, the way the plots were decorated, and the fact that my father is also a veteran, made this a very moving place for us.
3. NEBRASKA
I think Nebraska gets a bad wrap. When I hear people talk about it, it is usually within context of “I had to drive through Nebraska to get to...” Yes, I was driving through on a brisk fall day this past fall, but I think the colors in the encaustic wax captured the beauty in that particular day.
4. NEW MEXICO
I lived in New Mexico for six years and during that time I took a memorable day trip to Chimayo. Chimayo is just north of Santa Fe, a small village located on soil that is considered Holy. During the year people from around the world visit the churches here, and it is a sacred place during Holy Week. This is a wall along an area where people line up during Holy Week, and continue onward toward the churches. It is a beautiful and unique place.
- - - - - - - - - - - - - - - - - - - - - - - - - - - - - - - - - - - - - - - - - - - - - - - - - - - - - - - - - - - - - - - - - - - - - - - -
More will be coming SOON! I would love to know your thoughts on this particular series. Do you have you have any ideas of special locations in your state? What is unique or has a special story? I would love to hear your thoughts!
Encaustic Painting Process
Tuesday/September 30/2014 Filed in: Encaustic Painting
I have had a few questions regarding my art process and thought I would post about my process. I’ve been experimenting with encaustic for about two years and for the last 6 months began adhering pencil drawings to the surface of encaustic.
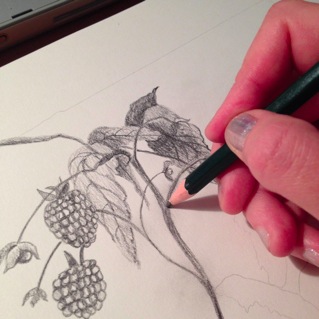
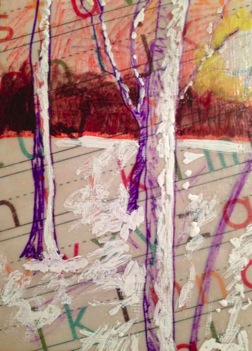
1. First, I create a drawing based off of a photo from my library. (When I say “library”, I am referring to 1,000s of original photos I have been collecting for years.)
For the pencils, I use a variety of drawing pencils ranging from 2H, HB to 6B. Even thin, soft lines can be transferred, so it is not necessary to make all your lines dark.
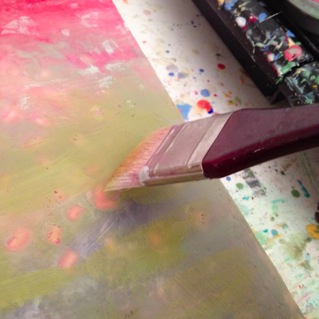
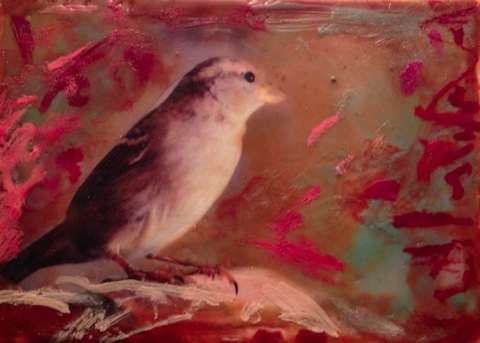
2. Time to heat up the encaustic paint!
Encaustic is basically a type of wax that contains pigment, and when it is heated it can be applied with a natural paintbrush (synthetic will melt!). I build up many layers of colors, scrape parts away, and sometimes carve it. If you have never used encaustic, you are missing out. The look and feel is completely different from oils or acrylics and it is so fun!
For my painting base, I only use Ampersand’s Encaustic Boards.
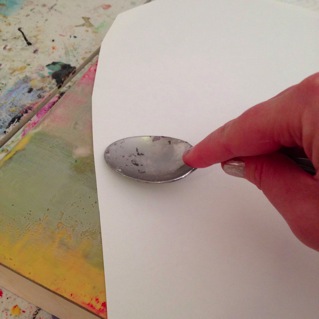
3. Turn the completed drawing upside down and place it on the cool or slightly warm, wax surface. If the encaustic paint is too hot your drawing will stick and you will more than likely pull up chunks of wax and ruin your drawing.
With a spoon burnish the backside of the paper. Make sure you that you rub everywhere and well. Take your time so that as much of the pencil can adhere to the wax as possible.
4. Slowly start to lift the paper from the painting. Some of the paper will stick and tear, which is ok. It is easy to remove bits of paper later and polish the piece.
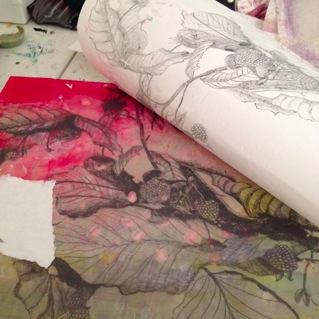
5. Carefully remove small pieces of paper with a knife or small tools. Use the heat gun to heat the surface. Be careful that you don’t get the tip too close to the painting. The goal is to adhere the pencil and wax together but if the surface gets too hot, your drawing will disintegrate!
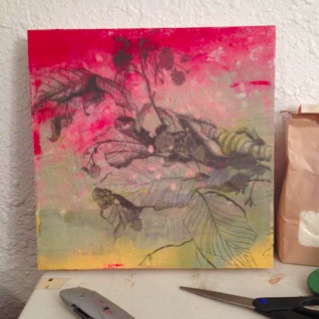
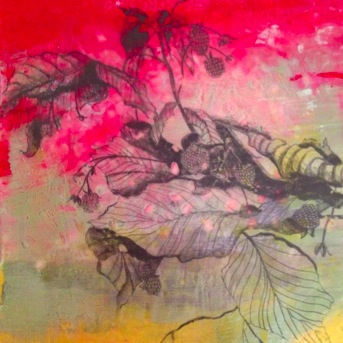
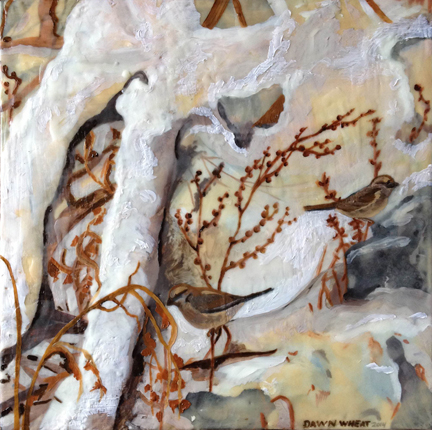
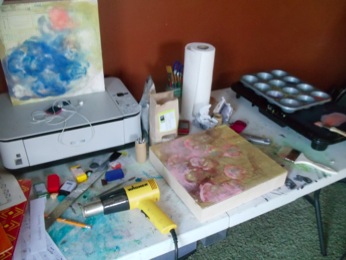
6. This is the final piece sitting in my studio. The great part of this process is that I really don’t know what the finish product will look like until it is done - the element of chance. However, the more I create, the more I can think ahead about how the drawing will be placed on the board and how it will match up with different pigments.
Also, I have been told that you can also copy your drawing with a toner copier and this will work the same as the pencil drawing. The advantage is that you can use the same image over and over. I have not tried that yet. If you have, let me know about it!
1. First, I create a drawing based off of a photo from my library. (When I say “library”, I am referring to 1,000s of original photos I have been collecting for years.)
For the pencils, I use a variety of drawing pencils ranging from 2H, HB to 6B. Even thin, soft lines can be transferred, so it is not necessary to make all your lines dark.
2. Time to heat up the encaustic paint!
Encaustic is basically a type of wax that contains pigment, and when it is heated it can be applied with a natural paintbrush (synthetic will melt!). I build up many layers of colors, scrape parts away, and sometimes carve it. If you have never used encaustic, you are missing out. The look and feel is completely different from oils or acrylics and it is so fun!
For my painting base, I only use Ampersand’s Encaustic Boards.
3. Turn the completed drawing upside down and place it on the cool or slightly warm, wax surface. If the encaustic paint is too hot your drawing will stick and you will more than likely pull up chunks of wax and ruin your drawing.
With a spoon burnish the backside of the paper. Make sure you that you rub everywhere and well. Take your time so that as much of the pencil can adhere to the wax as possible.
4. Slowly start to lift the paper from the painting. Some of the paper will stick and tear, which is ok. It is easy to remove bits of paper later and polish the piece.
5. Carefully remove small pieces of paper with a knife or small tools. Use the heat gun to heat the surface. Be careful that you don’t get the tip too close to the painting. The goal is to adhere the pencil and wax together but if the surface gets too hot, your drawing will disintegrate!
6. This is the final piece sitting in my studio. The great part of this process is that I really don’t know what the finish product will look like until it is done - the element of chance. However, the more I create, the more I can think ahead about how the drawing will be placed on the board and how it will match up with different pigments.
Also, I have been told that you can also copy your drawing with a toner copier and this will work the same as the pencil drawing. The advantage is that you can use the same image over and over. I have not tried that yet. If you have, let me know about it!
Raspberries
Sunday/September 28/2014 Filed in: Encaustic Painting
On a beautiful summer day when I was a child, I disappeared from my parents’ house. I was found later in the midst of the raspberry patch collecting berries for my Cheerios.
During my childhood my parents owned fifteen acres on the edge of Cedar Rapids, Iowa. The property was split by a narrow raspberry patch that spanned most of the garden, and my father mowed down the center so that berries could be reached from the outside and the inside. The neighbors were invited to pick and we always had a surplus to pile on vanilla ice cream during humid Iowa evenings.
Now, a container of raspberries cost about three to four dollars from the grocery store.
When my father died September 1, 2014, my mother's garden was brimming with burgundy berries and we ate them by the handful.
This encaustic and pencil painting “Raspberries” is my first finished piece since moving to Denver and following my father’s death.
I read somewhere that all art is made for someone, which is not necessarily a large, nondescript audience but a particular person. From a marketing perspective this seems ludicrous, but to me that is part of the joy of art. Sometimes, I have made a painting hoping that I was creating something for God. Sometimes, I desired to make a particular person laugh or to give them joy. But, in the beginning, like most children, I made art for my family.
Underneath the surface of my art, like the raspberries, there is a story. It may have started for one person, but it branches out, blooms and blossoms, until there is enough that you can invite the neighbors.
A New Landscape
Friday/June 27/2014 Filed in: painting
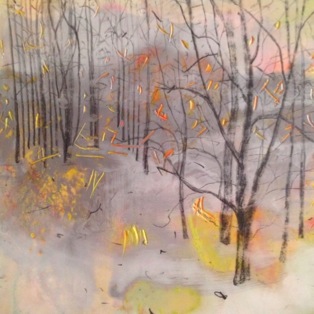
I’m getting ready to move to Colorado, and therefore finishing up some of the last paintings that I will do during my time in New Mexico. Here is a little landscape that I finished last night.
New Painting Labels!
Saturday/June 14/2014 Filed in: painting
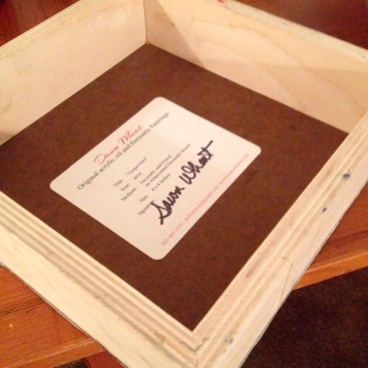
One of the difficult things with making paintings is how to keep track of all of the information with each piece (dimensions, medium, etc). For me and the customer, I am introducing new, professional-looking labels on the back of all of my paintings. Perfect for the collector that wants all of the information on each piece including my signature, year and contact information. What do you think?
Encaustic & Oil
Saturday/March 08/2014 Filed in: painting | Encaustic Painting
Working on another new piece this morning. Encaustic and oil on Ampersand’s Encaustic Board, 12 x 12 inches. I feel like I am getting closer to bringing these mediums together into a integrated, finished piece.
Experimenting
Before I spend the time to do a large painting, I will do small paintings to work out an idea or method.
Last month I have been expanding my repertoire of media to include scrap-booking paper. Being a non-scrap-booker (is that a word?) I had never paid attention to the array of papers that can be bought, until now. The above painting was created with laying down a coat of Encaustic medium to Ampersand Encaustic Board, then attaching a piece of paper. Using alternate layers of encaustic wax and oil, I created this little landscape of New Mexico (above).
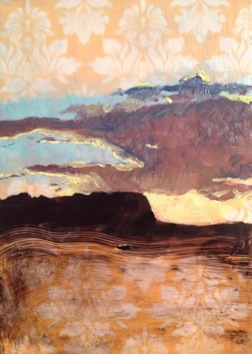
The painting above was created in a similar way, but instead I used markers and washes of oil.

The same with this one...letting the paper show through the transparency of oil and wax.
For this one I used a photograph that was taken by Michael Anaya-Gorman.
Last month I have been expanding my repertoire of media to include scrap-booking paper. Being a non-scrap-booker (is that a word?) I had never paid attention to the array of papers that can be bought, until now. The above painting was created with laying down a coat of Encaustic medium to Ampersand Encaustic Board, then attaching a piece of paper. Using alternate layers of encaustic wax and oil, I created this little landscape of New Mexico (above).
The painting above was created in a similar way, but instead I used markers and washes of oil.
The same with this one...letting the paper show through the transparency of oil and wax.
For this one I used a photograph that was taken by Michael Anaya-Gorman.
Trying encaustic
Saturday/April 27/2013 Filed in: Encaustic Painting
In February I was asked to help assist a few demos at the Artisan Art Supply stores in Albuquerque and Santa Fe for Ampersand Artist Boards. The demo was for encaustic, a medium within painting that I had never tried myself. After the demos, i decided to try it. I finally got all of the supplies together in my studio and it’s been really fun so far.